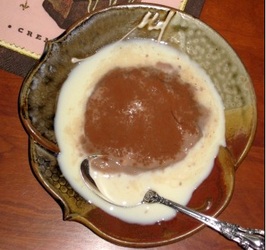
 This is the last photo from our New Year's Day brunch menu. I am loving this sweet/tart sorbet. And with winter prime time for blood oranges, I suggest you make this as soon as possible. A new, huge favorite of mine!  RECIPE, adapted... Sunset | January 2016 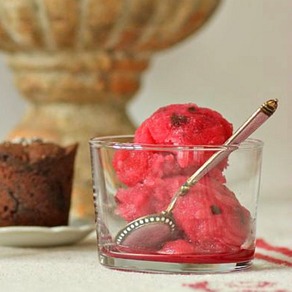 • 6 to 7 pounds blood oranges • 1/2 cup sugar • 1/4 cup light corn syrup • 1/4 cup Campari • 2 ounces bittersweet chocolate (60 percent cacao), chopped 1. Zest 2 oranges and set zest aside. Cut all oranges in half crosswise and juice enough to make 3 cups. 2. Heat 3/4 cup orange juice, the sugar, and corn syrup in a large saucepan over medium-high heat until sugar dissolves, 3 to 4 minutes. Remove from heat and stir in zest, remaining juice, and the Campari. Nest pan in a bowl of ice water, stirring occasionally, until mixture is cold, about 20 minutes. 3. Meanwhile, melt chocolate in a shallow metal bowl set over a saucepan with about 1 inch barely simmering water (or melt gently in a microwave). Set a sheet of parchment paper flat on a baking sheet. Spread chocolate on top in a 7-inch square. Freeze until firm, at least 20 minutes; keep in freezer. 4. Freeze juice mixture in an ice cream maker according to manufacturer's instructions, about 25 minutes. Transfer to a metal bowl, cover, and freeze 1 hour. Break up chocolate into pieces about 1/2-inch-by-1-inch. Stir sorbet to blend, then fold in chocolate with a flexible spatula until evenly distributed. Freeze until sorbet is firm enough to scoop, at least 3 more hours. Stir well one more time before serving. MAKE AHEAD: Up to 1 week; before serving, let stand at room temperature about 15 minutes to soften. TAKE a LOOK:
1 Comment
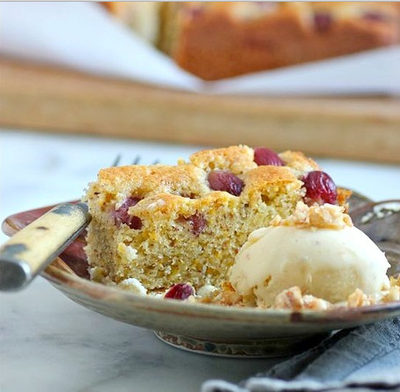
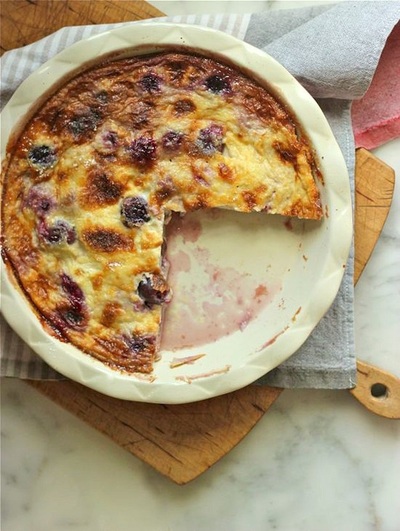
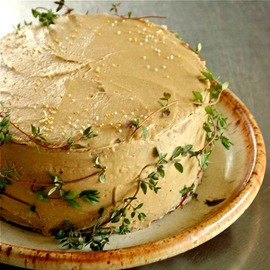
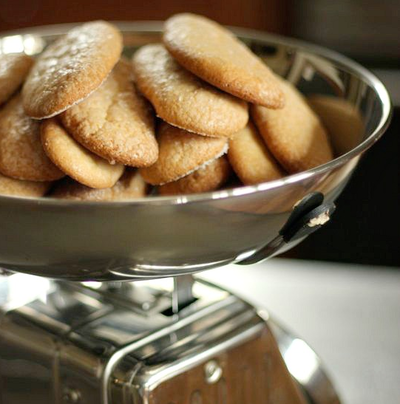
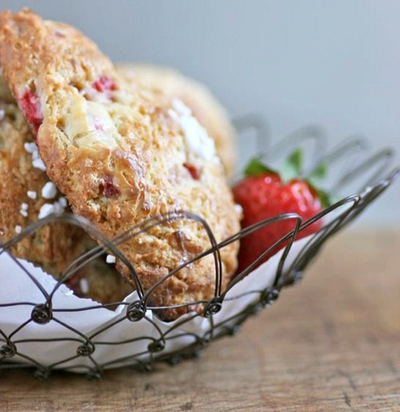
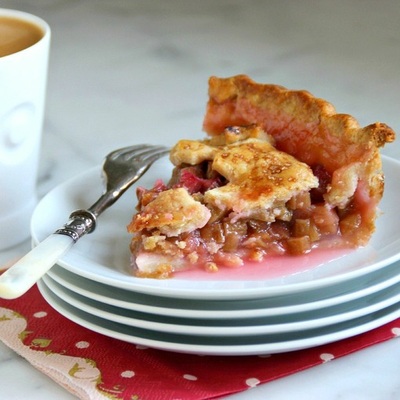
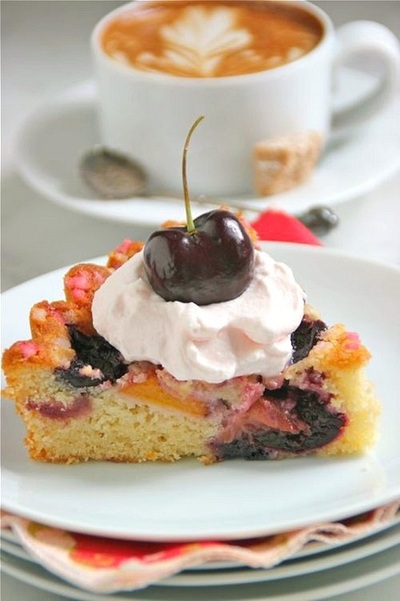
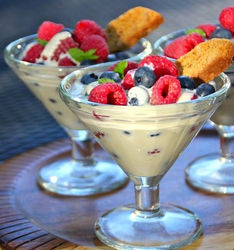
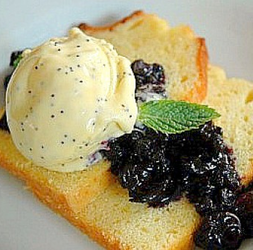
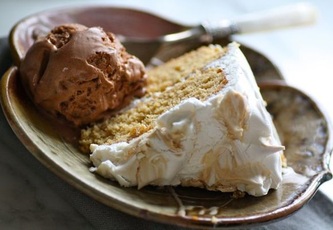
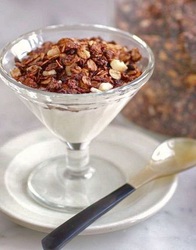
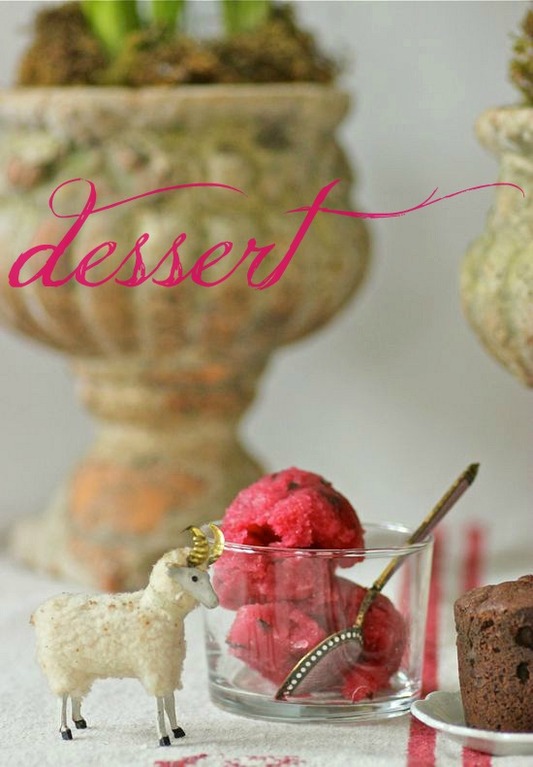
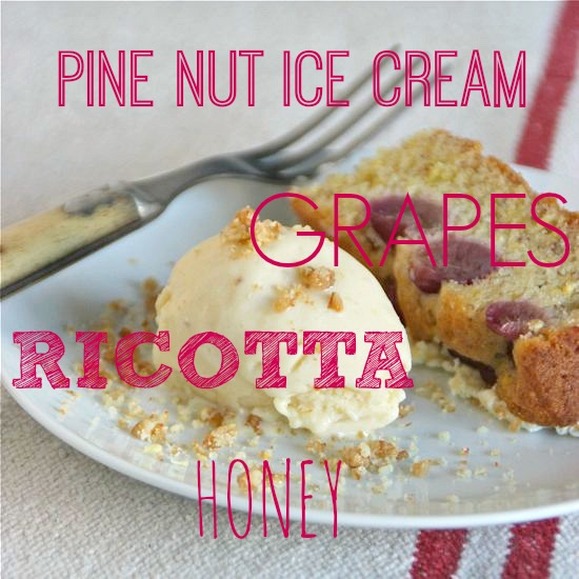 What I love most about visiting France is the inspiration I find in just about everything == it's endless. I believe it is impossible to be there and not be influenced in some small way, visually or gastronomically. Most likely, it will be both of those. In the weeks before I travel to Paris, or anywhere else in France, I note historical and cultural centers I should see in addition to pâtisseries I've been longing to visit and restaurants where I want to eat. But I'm also a big believer in just heading out in a different direction each morning to see where the streets take me. I am never disappointed. I'm always guaranteed unique discoveries that will inspire the way I approach something once I return home to St. Paul. 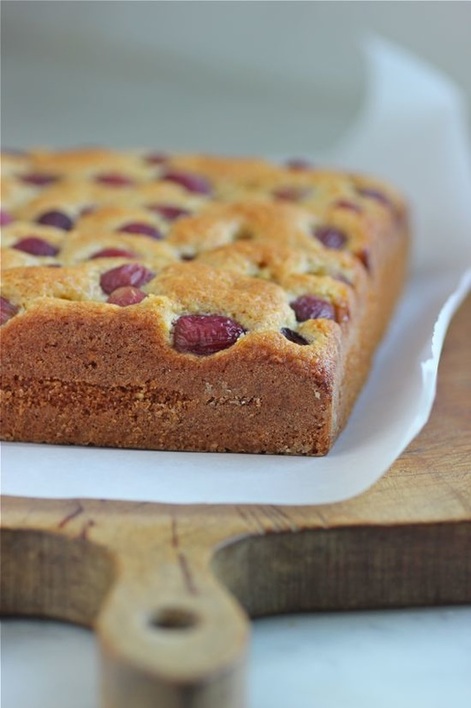 This recent trip was no exception. In addition to the 1200 plus photos I returned with, which remind me daily of the beauty that abounds, I ate foods that I knew I would attempt to recreate once at home. For me, that is the most meaningful thing I can do to remember a trip. There's nothing like being around the table on our patio with friends and family and eating a meal filled with delicious memories (A French Inspired Meal, French Cauliflower Soup with Truffle Oil). 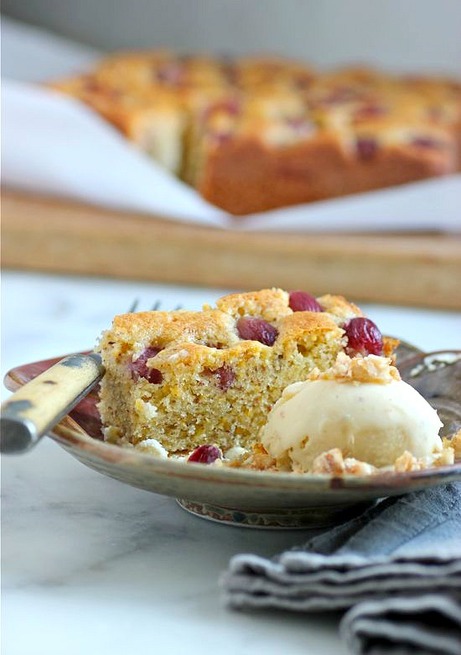 One of the culinary highlights during my time in Paris was dinner at Restaurant Verjus. I had read about it in food magazines and was reminded by friend and food blogger Stacey that the American owners, Braden Perkins and Laura Adrian (a St. Paul native ?!), started their French culinary career by running the highly successful underground restaurant, Hidden Kitchen, out of their Paris apartment. While googling info on Verjus, I came upon a restaurant review by Alexander Lobrano for Saveur magazine. He summed up beautifully my experience there. (If interested, read the 2012 article HERE.) There is no ordering à la carte at Verjus. The meal is a tasting menu of approximately 8 courses. The only thing we were asked before the service began, was if either my husband or I had any food allergies and if we wanted the staff to pair each course with the recommended wine. We ended up talking with diners on both sides of our table throughout our meal, and if I had to describe the atmosphere, it could only be "festive". Everyone dining at Verjus that night was very happy to be there. My little home kitchen project became the dessert I ate at Verjus that night. There are several components to this dish, but the ice cream, candied pine nuts and fresh ricotta can all be made ahead. I suggest making the cake the day of, only because I like how it slices; the cake's texture becomes more crumbly over time but the flavor is definitely as good. 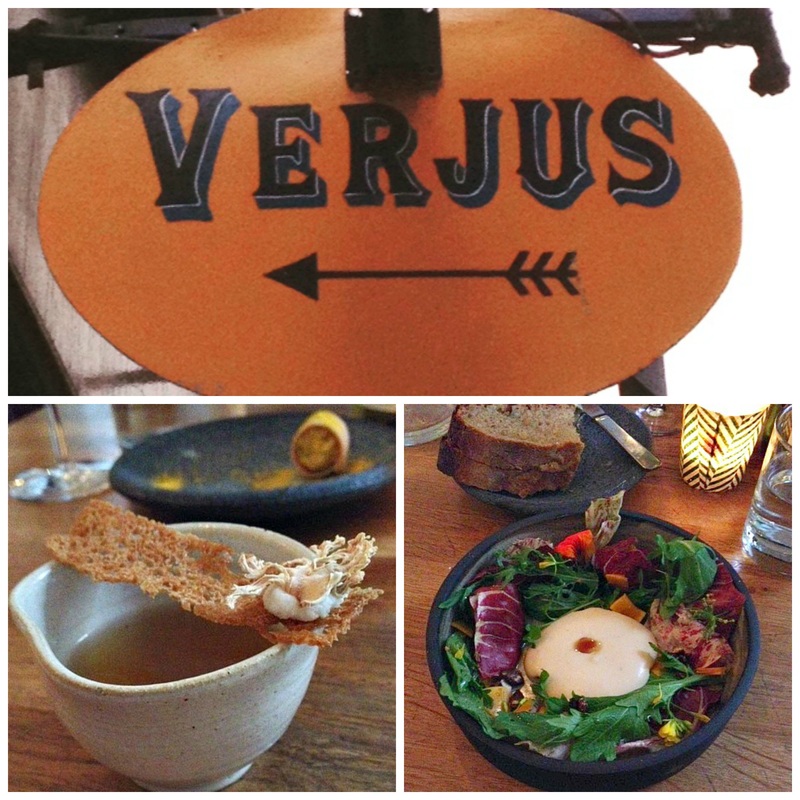 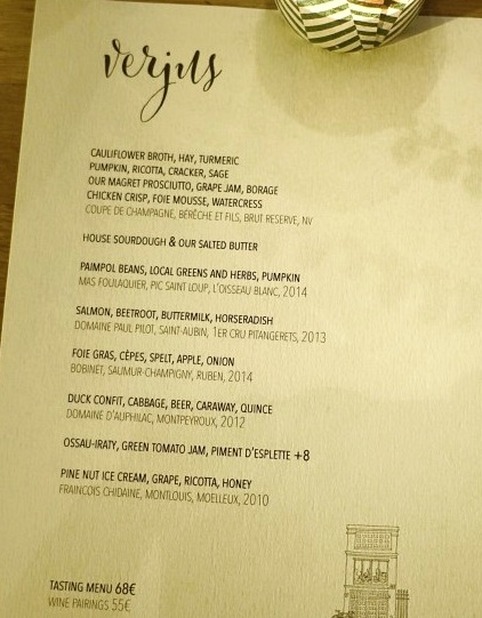  PINE NUT ICE CREAM + found on Chowhound MAKE ICE CREAM THE DAY BEFORE • 3/4 cup pine nuts • 3/4 cup sugar, divided •2. 1/2 cups whole milk • 1 teaspoon almond extract • 5 egg yolks 1. Put 3/4 cup of pine nuts in a pie pan and roast them at 350 until fragrant. Put roasted pine nuts and 1/4 cup sugar in a food processor. Process until you get a peanut butter-like consistency, Combine this with 2 1/2 cups whole milk in a saucepan. Add 1 teaspoon almond extract. Bring to a boil and then immediately remove from the heat. 2. While the milk is heating. whisk together the 5 egg yolks with the remaining 1/2 cup sugar. Once milk mixture boils, slowly pour it into the egg mixture. Pour back into saucepan and heat over low heat - DO NOT BOIL - stir constantly. Remove from heat once custard is thick enough to coat a spoon, about 10 minutes. Cool in the fridge for at least 3 hours or overnight. 3. Put into your ice cream maker and churn as directed. Freeze overnight. CANDIED PINE NUTS + found on about.com * 1/2 cup pine nuts • 1 1/2 teaspoons honey • 1 1/2 teaspoons water • 1 tablespoon granulated sugar • Pinch of salt • 1/8 cup Demerara sugar 1. PREHEAT oven to 350˚F. In a small bowl, whisk together the honey, water, salt, and granulated sugar until smooth. Toss the pine nuts and Demerara sugar in the honey mixture stirring well to coat. 2. Spread the nut mixture onto a parchment lined baking pan in a single layer and bake until the nuts are golden brown. Watch closely so nuts do not burn. Allow the nuts to cool to room temperature; chop coarsely. Keep candied pine nuts in an air-tight container. OLIVE OIL CAKE with RED GRAPES + recipe, adapted, found at marthastewart.com • 1/2 cup extra-virgin olive oil, plus more for pan • 1 cup unbleached all-purpose flour, plus more for pan • 1/2 cup almond meal • 1/4 cup coarsely ground yellow cornmeal • 1 1/2 teaspoons baking powder • 1/2 teaspoon salt • 2 large eggs • 2/3 cup sugar • 2 teaspoons finely grated lemon zest • 1/3 cup whole milk • 2 cups red seedless grapes 1. PREHEAT oven to 350˚F. Brush a 9-inch square pan with oil; dust with flour, tapping out excess. Whisk together flour, almond meal, cornmeal, baking powder, and 1/2 teaspoon salt. Beat eggs, sugar, and zest with a mixer on high speed until pale and fluffy. Reduce speed to low; slowly add the oil. Beat in flour mixture in 3 additions, alternating with milk, and beginning and ending with flour. 2. Spoon the batter into pan. Scatter 1 cup of grapes over the top. Bake for 15 minutes. Scatter the remaining 1 cup grapes over cake. Bake until cake is golden and a toothpick inserted into the center comes out clean; another 25 to 27 minutes. Let cool in pan on a wire rack, then turn out and slice into thin rectangles. 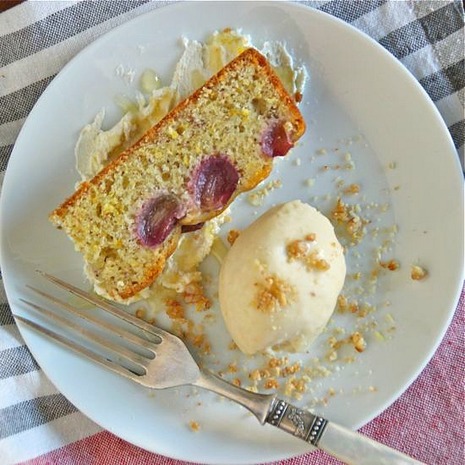 ASSEMBLY: • Fresh Ricotta • Good quality, runny Honey • Olive Oil Cake with Red Grapes • Pine Nut Ice Cream • Candied Pine Nuts 1. On a small plate, smear a large spoonful of Fresh Ricotta; drizzle ricotta with honey. Place a slice of the Olive Oil Cake on top of ricotta. Add a scoop of the Pine Nut Ice Cream to the plate and sprinkle with the Candied Pine Nuts. Serve and Enjoy! TAKE a LOOK: 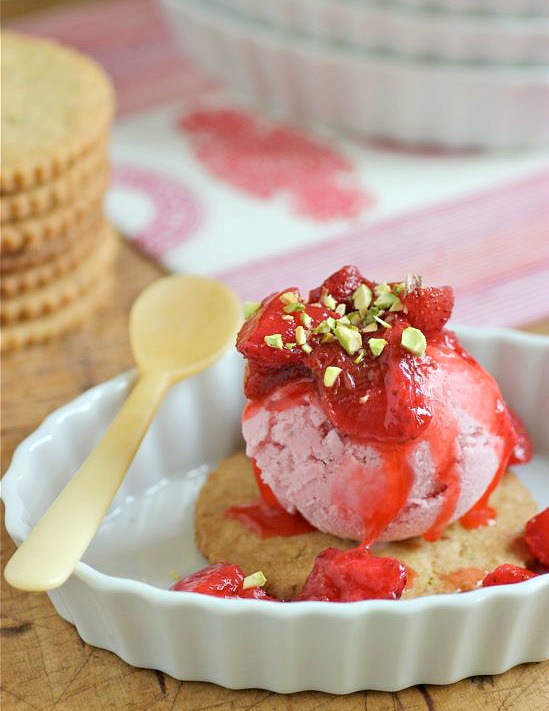 Too many strawberries? It's a dilemma I don't mind having. Every summer when my family goes up north for the 4th of July, we head to a local strawberry patch to pick berries. On this trip, a huge containerful made it back to St. Paul with me and I started imagining a dessert that would use up a hefty share of the extremely ripe berries. First, I made the Gingered Strawberry-Rhubarb Compote. In addition to the strawberries, I also have more rhubarb than I know what to do with in my vegetable garden. The eight plants not only supply my kitchen, but anyone else who happens to stop by and can be coerced into taking a bagful home. The addition of candied ginger and lime zest was a nice balance to the sweetness of the sauce. 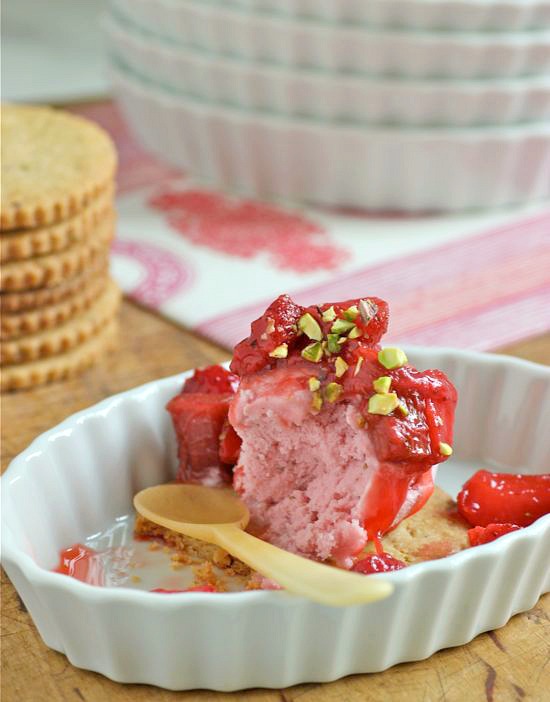 Next came the Strawberry Gelato; simple enough to make with sugar, milk & cream, fresh strawberries, and lemon juice. And from the beginning, I knew I wanted my Strawberry Gelato to set upon a buttery, nicely-browned shortbread cookie. Several of the meals I ordered on my recent trip to Provence included a thin, rectangular shortbread cookie with something sweet or savory piped on top. 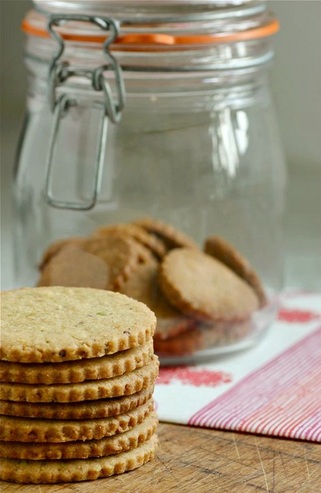 I used a Melissa Clark pistachio shortbread recipe and altered it slightly for my thinly-rolled cookies. Instead of stirring chopped pistachios into the dough and shaping it into logs, I ground them finely in a food processor along with the flour and confectioners' sugar, giving me flecks of pistachios throughout the finished cookies. The components of this dessert are all delicious on their own, but the combination of the three is a winner and a great way to take advantage of sweet, local strawberries.  STRAWBERRY GELATO recipe from: Raymond D' Ottavio at Aunt Lena's Creamery in Chandler, Arizona • 12 ounces fresh strawberries (hull removed) • 3/4 cup sugar • 2 cups whole milk • 1/2 cup heavy cream • 1 teaspoon fresh lemon juice 1. Combine the strawberries, sugar, and milk in a blender container. Pureé until smooth. Add the heavy cream and pulse very briefly, just to combine. Stir in the lemon juice. 2. Transfer the mixture to a bowl or pitcher and refrigerate for at least 4 hours. 3. Pour the mixture into an ice cream machine and freeze according to the manufacturers instructions. Transfer to a freezer container and store in freezer for up to 1 month. 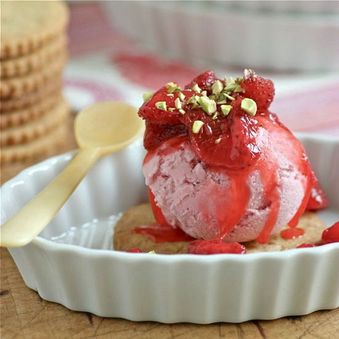 STRAWBERRY-RHUBARB COMPOTE with GINGER and LIME Bon Appétit | April 2003 • 2 pounds strawberries, halved if large • 1 pound rhubarb, cut into 3/4-inch pieces • 3/4 cup sugar • 3 tablespoons finely-minced crystallized ginger • 1 tablespoon fresh lime juice • 3/4 teaspoon grated lime peel 1. Combine 1 1/2 pound of the strawberries and all of the rhubarb in a medium size pot. Add the sugar, crystallized ginger, lime juice and peel and bring to a boil. Stirring often, boil the mixture for about 3 minutes. Reduce the heat and simmer the mixture until the rhubarb has softened; about another 3 minutes. 2. Remove from heat and stir in the remaining 1/2 pound fresh strawberries. Allow the mixture to cool and transfer to an air-tight container. Store in the refrigerator. 3. The compote is good on its own served with crème fraîche, or over plain yogurt, ice cream or bread pudding. ROLLED PISTACHIO SHORTBREAD COOKIES an adapted recipe: Bon Appétit | August 2007 • 1 1/2 cups unbleached, all-purpose flour • 1/2 cup plus 2 tablespoons confectioners' sugar • 1/2 teaspoon kosher salt 1/2 cup shelled pistachios • 3/4 cup (1 1/2 sticks) cold, unsalted butter, cut into 1/2-inch cubes • 1 large egg yolk • 3/4 teaspoon pure vanilla extract 1. In the bowl of a food processor, combine the flour, confectioners' sugar, kosher salt, and pistachios. Process until the pistachios are finely chopped and incorporated through-out the mixture. 2. Add the butter, egg yolk, and vanilla. Pulse the butter-flour mixture until the dough begins to come together. Transfer the dough to a sheet of plastic, wrap, and flatten into a disk. Place dough in refrigerator until cold, at least 2 hours. 3. When ready to bake, PREHEAT the OVEN to 325˚F. 4. Take the dough from the refrigerator and cut the disk into quarters. Take one quarter and place on a lightly-floured work surface. Return the remaining dough to the refrigerator. Sprinkle the dough lightly with flour and roll to a thickness of just over 1/8-inch. Cut out cookies with desired cookie cutter (mine was a 2 3/4-inch round) and transfer to a parchment lined baking sheet. Place the baking sheet on middle rack of oven and bake for 10 to 12 minutes, or until the cookies are a light, golden brown. Remove from oven and transfer cookies to a cooling rack. Repeat rolling/baking with remaining dough. 5. When cookies have cooled, transfer to a tin or airtight container. ASSEMBLY • Place Pistachio Shortbread Cookie on a small plate or shallow bowl. Top with a scoop of Strawberry Gelato and spoon Strawberry-Rhubarb Compote onto the gelato. Sprinkle with chopped pistachios if desired and serve. TAKE a LOOK: 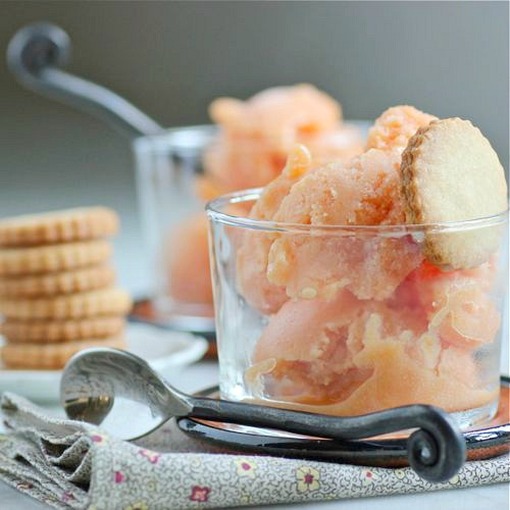 The plan was to make ice cream with many of the 100+ peaches I picked in Iowa. But after bookmarking several recipes found online, I realized I had no heavy cream in my refrigerator -- a rare occurrence at my house and an essential ingredient in ice cream. I opted instead for a healthier version of what I had envisioned -- Peach Sherbet made with milk. I also wanted a simple, little cookie to serve alongside the Peach Sherbet. There's nothing easier than making Lionel Poilåne's 4 ingredient Punitions, and with Dorie Greenspan's book, Paris Sweets, we are able to make this cookie at home. They can be purchased when in Paris at Poilåne's, 8 Rue du Cherche-Midi in the 6th Arrondissement. A basketful of sample Punitions is great strategy on Poilåne's part. After eating one of the French butter cookies, you most likely will purchase one bag for yourself and additional bags as gifts for friends back home (or maybe just more bags for yourself ;-) • The sherbet is still delicious after several days in the freezer, but scoops up easiest the day it is made. • I used salted butter in the Punition cookies. You really won't notice much of a difference whether salted or unsalted is used. I do, however, recommend using European butter. The fat content is higher and any cookie benefits from that!  Peaches at the Velleron evening market | Provence + PEACH SHERBET adapted recipe from Four-Star Desserts by Emily Luchetti • 4 pounds very ripe peaches • 2 cups granulated sugar • 2 cups water • 1 1/2 cups milk (I used whole) • 1/4 teaspoon vanilla extract • 1/4 teaspoon almond extract • Pinch of salt 1. Halve the peaches. Leave skins on but remove the pits. 2. Place the peaches in a large pot with the sugar and water. Cook the peaches over medium heat until they are soft when pierced. Purée the peaches in a blender or food processor, along with the liquid. This will need to be done in several batches. When finished, cool to room temperature. Stir in the milk, vanilla, almond extract, and salt. Place the mixture in the refrigerator until cold. 3. Freeze sherbet mixture in an ice cream machine according to manufacturer's instructions. • This recipe makes 2 quarts. It was necessary for me to freeze 2 separate quarts since I have a small machine. The mixture will keep for several days in the refrigerator. + PUNITIONS recipe from Paris Sweets by Dorie Greenspan • 1 1/4 sticks (5 ounces; 140 grams) unsalted butter, at room temperature • Slightly rounded 1/2 cup (125 grams) sugar • 1 large egg, at room temperature • 2 cups (280 grams) all-purpose flour 1. Put the butter in the work bowl of a food processor fitted with the metal blade and process, scraping down the sides of the bowl as needed, until the butter is smooth. Add the sugar and process and scrape until thoroughly blended into the butter. Add the egg and continue to process, scraping the bowl as needed, until the mixture is smooth and satiny. Add the flour all at once, then pulse 10 to 15 times, until the dough forms clumps and curds and looks like streusel. 2. Turn the dough out onto a work surface and gather it into a ball. Divide the ball in half, shape each half into a disk, and wrap the disks in plastic. If you have the time, chill the disks until they are firm, about 4 hours. If you’re in a hurry, you can roll the dough out immediately; it will be a little stickier, but fine. (The dough can be wrapped airtight and refrigerated for up to 4 days or frozen for up to 1 month.) 3. Position the racks to divide the oven into thirds and preheat the oven to 350°F (180°C). Line two baking sheets with parchment paper. 4. Working with one disk at a time, roll the dough out on a lightly floured surface until it is between 1/8 and 1/4 inch (4 and 7 mm) thick. Using a 1 1/2-inch (4-cm) round cookie cutter, cut out as many cookies as you can and place them on the lined sheets, leaving about 1 inch (2.5 cm) space between them. (You can gather the scraps into a disk and chill them, then roll, cut, and bake them later.) 5. Bake the cookies for 8 to 10 minutes, or until they are set but pale. (If some of the cookies are thinner than the others, the thin ones may brown around the edges. M. Poilâne would approve. He’d tell you the spots of color here and there show they are made by hand.) Transfer the cookies to cooling racks to cool to room temperature. TAKE a LOOK: 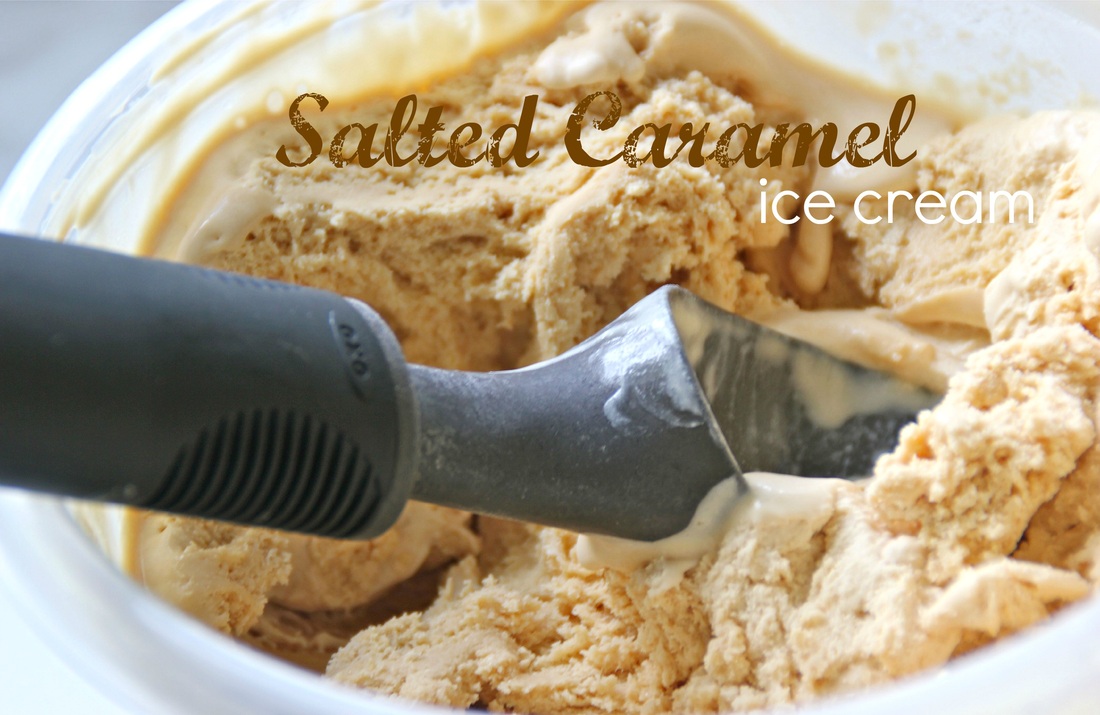 Spring is a busy birthday season at our house. My eldest daughter just celebrated her 27th birthday. She also just discovered she has a gluten intolerance. I think we're all asking ourselves... why didn't we figure this out sooner? Now, I will need to be extremely aware of the ingredients I'm using whenever she comes over for dinner. 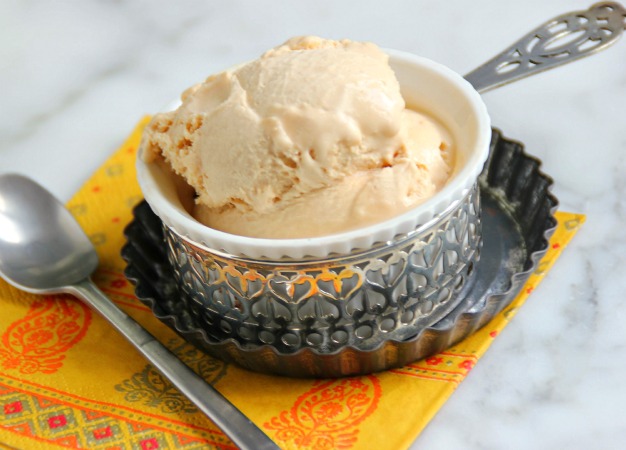 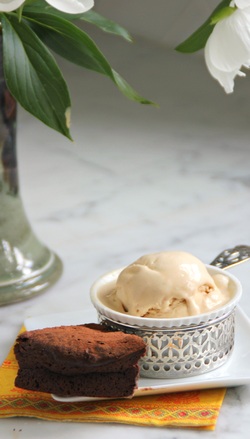 My daughter's birthday cake was a flourless chocolate cake I've made for years. We all like this little dense, fudgy cake; but the stand-out at this birthday party was the Salted Caramel Ice Cream that was served alongside. We often treat ourselves to salted caramel at a local ice cream shop in St. Paul. This was the first time I've made it at home. I found this recipe through the Barefoot Contessa. After I made the salted caramel, combined it with the ice cream base, and put it in the refrigerator to chill, I started scrolling through the "comment" section of the on-line recipe. Honestly, had I read the comments first, I probably never would have attempted this ice cream. Everyone agreed it was the best salted caramel ice cream they had ever eaten, but the majority also said it had its challenges -- number one being, it was practically impossible to get a frozen ice cream with a scoop-able consistency. This is what I found (and did)... 1. I made the ice cream base and let it set at room temperature while I immediately made the salted caramel. Be patient with the caramel. You will need to stir the mixture continually for some time before all of the caramelized clumps dissolve and give way to a smooth texture. After it's off the heat, stir the caramel over an ice bath until cool enough to add to the ice cream base. At that point, I used a whisk to combine the two until smooth with no lumps of caramel remaining. 2. I was more concerned with the finished ice cream having time to firm up in the freezer than I was with chilling the ice cream mixture before freezing in the ice cream machine. So -- I put the liquid mixture in the freezer for about two hours. It was just starting to freeze along the sides of the bowl. At that point, it was good and cold! I poured it into the ice cream machine's container and ran the ice cream maker for at least 45 minutes. It actually set up beautifully. Keep in mind, it is a soft ice cream. When I pulled the finished ice cream from the freezer the next day to serve, it scooped up beautifully and tasted delicious. It is not an ice cream you would want to leave unattended. It does start melting rather quickly. So eat up right after you've filled your dish!  CARAMEL: • 1 1/4 cups sugar • 3/4 cup heavy cream • 2 teaspoons sea salt, such as Maldon ( I used Fleur de Sel) • Ice Cream Base (recipe follows) • 1 tablespoon good quality pure vanilla extract 1. Heat the sugar in a dry heavy-bottomed sauce pan over medium heat. Stir with a fork just until the sugar starts to melt. At that point, do not stir, but instead, lift the pan to gently swirl the liquid so it melts evenly. Cook until the liquid is an dark amber color. 2. Pour the heavy cream into the mixture while stirring (it may splatter, so be careful). Continue to stir over medium to medium-low heat until there are no lumps remaining. Be persistent. The lumps will disappear. Transfer the mixture to a heat-proof bowl, stir in the salt, and place the bowl into an ice bath. Stir until the mixture has cooled down. At that point, combine it with the Ice Cream Base. Gently whisk the mixture until there are no visible caramel lumps. Be persistent with this and the lumps will eventually disappear. Add the vanilla. 3. Chill the mixture until very cold. This can take several hours. I placed my covered bowl in the freezer for about 2 hours. The mixture was just beginning to show signs of freezing around the edges. At that point I poured the mixture into the ice cream maker and "churned" the cream for about 45 minutes. It will become very thick, but will still be soft. Transfer to a freezer container and for best consistency, freeze overnight. ICE CREAM BASE: • 1 cup whole milk • 4 large egg yolks • 3/4 cup sugar • 2 cups heavy cream 1. Heat milk in a heavy sauce pan over medium-low heat. 2. Make an ice bath by filling a large bowl with ice water. Rest a medium-size bowl on top of the ice water and place a fine mesh strainer over the bowl. 3. In another bowl, combine the egg yolks and sugar. Whisk the mixture until it is pale yellow in color and the sugar has dissolved. While whisking, slowly pour the warmed milk into the egg mixture. Return the mixture to the sauce pan and cook over medium-low heat, stirring constantly, until it coats the back of a wooden spoon -- about 3 to 5 minutes. Do not overcook or you will scramble the eggs! 4. Strain the custard into the top bowl of the ice bath to stop the cooking process. Add the heavy cream and stir over the ice bath until cool. Set aside. Stir the caramel mixture into the custard (see instructions above), cover, and chill. TAKE a LOOK: 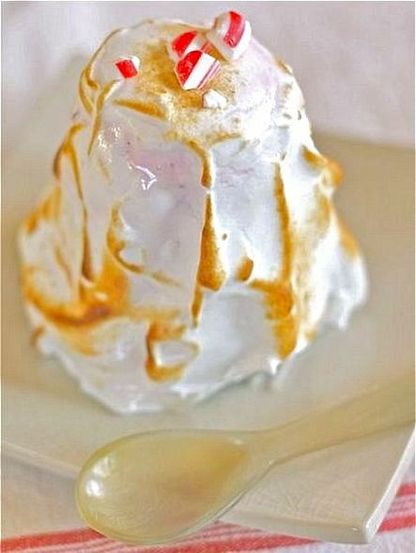 The first time I ever had a Baked Alaska, I must have been 8 or 9 years old. My mother served it as the dessert to our mid-day meal. I didn't know very much about cooking or baking at that age. I occasionally stood in the kitchen watching my mother at work, but that was rare. I would rather be outdoors with friends, running and playing games, knitting in a lawn chair under a shade tree, or drawing. My mother was a great cook and loved doing it. Why did I need to know how to cook and bake when she was so capable of doing exemplary things in the kitchen? I honestly thought she was nuts (can I say that?) when she told me what she was going to do. Who in their right mind would put ice cream in a 500˚F oven? When the golden brown meringue emerged from the oven and wasn't floating in a pool of milky liquid, I thought my mother was a genius. I wonder, when she did something like this, if she had any clue she'd be creating such wonderful memories for me? I used a brownie base for the peppermint ice cream in my individual Baked Alaskas. I initially wanted salted caramel ice cream, but soon realized I didn't have enough time to make my own. I then decided peanut butter ice cream was what I wanted on top of the brownie. I would sprinkle candied peanuts on top of the torched meringue. Another disappointment; peanut butter ice cream was not to be had that day. Peppermint won by default. Feel free to experiment with any flavor ice cream, sherbert or sorbet that inspires you.  . . . with peppermint ice cream 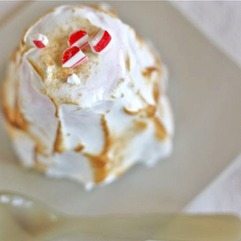 Serves 6 - 8 • Brownies (recipe here) Bake in a 9-inch-by-13-inch baking pan, buttered and lined with parchment paper extending 1-inch over the long sides of the pan. Check frequently after 20 minutes, and remove from the oven before becoming dry. • 1/2 gallon peppermint, peanut butter, salted caramel, or any flavor ice cream you prefer, softened (you will probably not use the entire half gallon). FOR THE CHOCOLATE GANACHE: • 1/3 cup heavy cream • 1/2 cup semi-sweet chocolate chips • Italian Meringue (recipe here) Steps 1 and 2 will need to be completed the day before you plan to eat the Baked Alaskas. 1. Bake the brownies. When cool, grab the parchment overhanging the sides of the pan, and lift the brownies to a work surface. 2. Line 6 small custard cups or 8 timbale molds with plastic wrap. Using a spoon, pack the containers full with ice cream. Cover the tops with the over-hanging plastic wrap and press gently to remove any air pockets in the ice cream. Place the containers in a shallow metal pan and place in the freezer. 3. Using a round cookie/biscuit cutter, cut brownie discs the size of the base of the custard cups or timbale molds. In a small saucepan, heat the heavy cream until bubbles just start to form on the edge of the surface. Take the saucepan from the heat and add the chocolate chips. Let the mixture set for about 3 minutes then stir until smooth. Remove the ice cream from the freezer. Spoon a dollop of the the chocolate ganache onto each of the brownie discs. Pull the formed ice cream from their molds and place on top of the brownie. The chocolate gananche will work as a "glue" to hold the ice cream in place. Return ice cream and brownie Alaskas to the freezer. 4. Make the Italian Meringue following the recipe above. Take the ice cream from the freezer. At this point, you can either spoon meringue onto the individual ice cream and brownie desserts and spread decoratively with a knife, or place the meringue into a pastry bag and pipe the meringue onto the ice cream. Just be sure to cover the ice cream and brownie completely. Do not leave any part exposed. Return the meringue covered desserts to the freezer until ready to serve (they can be left in the freezer for up to one day). 5. Remove desserts from the freezer and either use a butane torch to brown the meringue or place the Alaskas in a pre-heated 500˚F oven and bake until browned. WATCH CLOSELY if you use the oven! 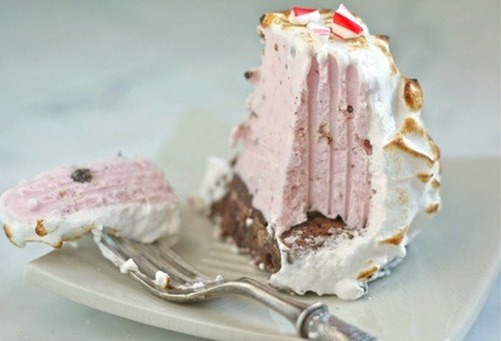 TAKE a LOOK: 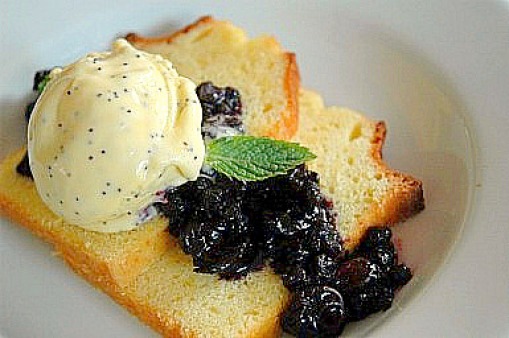 My family has a lemon addiction. Given the choice, we will always choose a lemon dessert over chocolate. One family member in particular was making me feel extremely guilty for not having made anything lemony for quite a while. That disgruntled family member would be quite happy if I gave her a spoon and a jar of homemade lemon curd. I chose instead to make this wonderful lemon loaf cake with a sauce of wild blueberries and dried tart cherries, and topped the two off with homemade lemon-poppy seed ice cream. 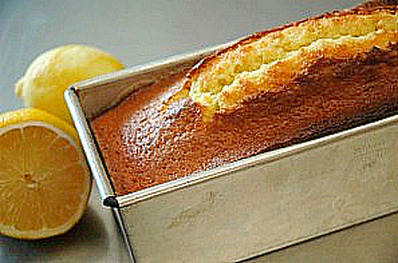 If you don't have enough time to make all three, make either the lemon loaf cake that bakes up with a beautiful, delicate crumb, and is delicious toasted for breakfast... or the lemon-poppy seed ice cream which I predict after tasting, you will make often. 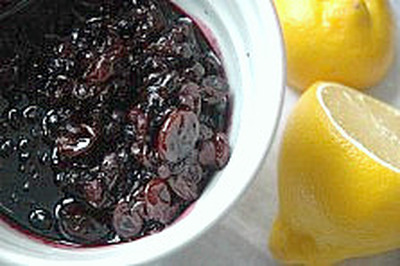 I could also see the blueberry sauce drizzled over a stack of lemon-cornmeal pancakes... Yum |


Categories
All
|